The window to buy this is before the storm season begins — not during it. After a major storm is announced, Starlink hardware sells out. Installation appointments fill. The time to have satellite internet is the Tuesday in April when you have nothing else going on and the weather is fine.
This guide assumes you are an adult somewhere between 50 and 70, you have aging parents or are starting to think about your own independence, and you live in a place where hurricanes, ice storms, wildfires, or floods are a real possibility. If any of that is true, read this page before the next storm season starts.
🚨 A Real Account — Southwest Florida, 2022
Twelve Days Without a Signal — and One Family That Had One
When Hurricane Ian made landfall on September 28, 2022, it was the deadliest hurricane to strike Florida since 1935. The storm killed 149 people. Many of the deaths were not from wind or water alone. They were from isolation — seniors who could not call for help, could not reach family, could not summon paramedics because every cell tower in a 50-mile radius was either destroyed, flooded, or overwhelmed.
One retired couple in Cape Coral had installed Starlink six months earlier on the advice of their son, who lived in Texas. When Ian hit, their power went out with the rest of the neighborhood. They ran their Starlink dish on a portable battery station. For twelve days while neighbors had no communications at all, they had internet. They coordinated medication pickups for four neighbors who depended on insulin refrigeration. They relayed welfare checks to six families whose out-of-state relatives could not reach them by phone. They tracked the FEMA distribution schedule and sent the information through neighborhood Facebook groups that only they could access. Their son said later: “That $500 dish did more good in those twelve days than anything else in the neighborhood.”
The cell towers came back online gradually, over eight to twelve days. Some areas waited three weeks. Landlines were worse. The couple’s Starlink signal dipped during the worst rain bands but never went fully dark.
✅ Lesson: Satellite internet operates independently of the infrastructure that fails in disasters. One Starlink terminal with battery power kept a neighborhood connected during a twelve-day communications blackout. The hardware cost less than one night in a hotel. The subscription cost less than a car insurance payment.
149
Deaths from Hurricane Ian, 2022 — many involving isolation from emergency services
12
Days some Southwest Florida areas had no cell service after Ian
70%
Of U.S. cell towers have less than 8 hours of backup power (FCC data)
6,000+
Starlink satellites in low-Earth orbit as of 2026
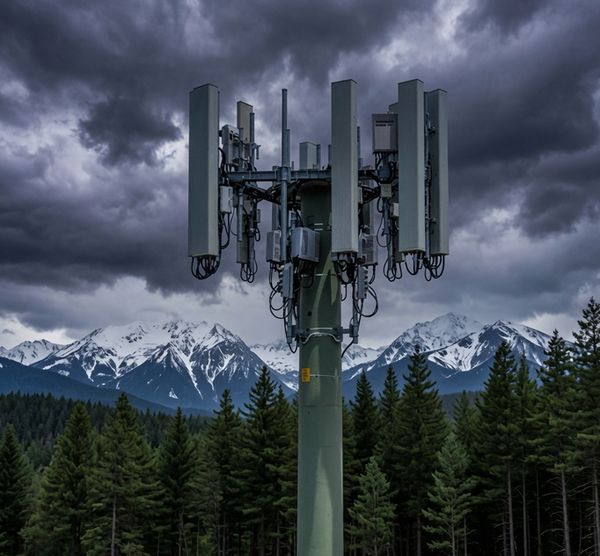
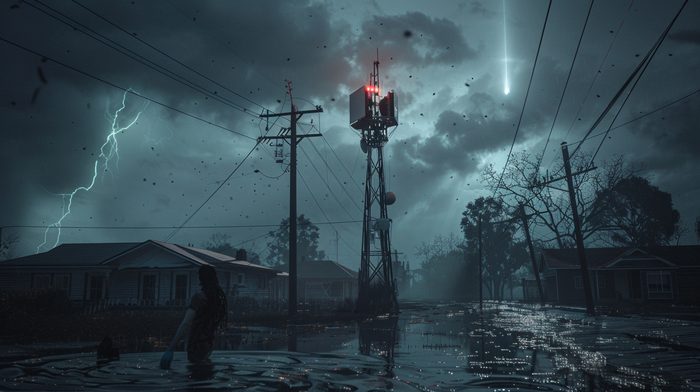
Cell towers look permanent and solid. Most people assume they will keep working through anything. They do not. Here is what actually happens in a disaster:

Power failure
Cell towers run on commercial power. When the grid goes down, they switch to battery backup — typically four to eight hours, according to FCC studies. Some have generators. Many do not, or the generators run out of fuel within a day or two. In a major storm, the grid can be down for weeks. The towers go dark long before the power comes back.
Network congestion
Even towers that stay powered become useless within hours of a major disaster. Every person in the affected area is trying to call family, call 911, check social media, or look up shelter locations at the same time. The voice and data networks overload. Calls drop. Texts take hours. Data connections fail entirely. This is called network congestion and it is predictable and inevitable in every major emergency event.
Physical destruction
Hurricane-force winds, storm surge flooding, and falling trees physically destroy cell towers and the fiber lines that connect them. In Ian, Katrina, and Maria, entire counties lost every piece of cell infrastructure. There is no signal because there is no tower — not because of power, not because of congestion, but because the physical hardware is gone.
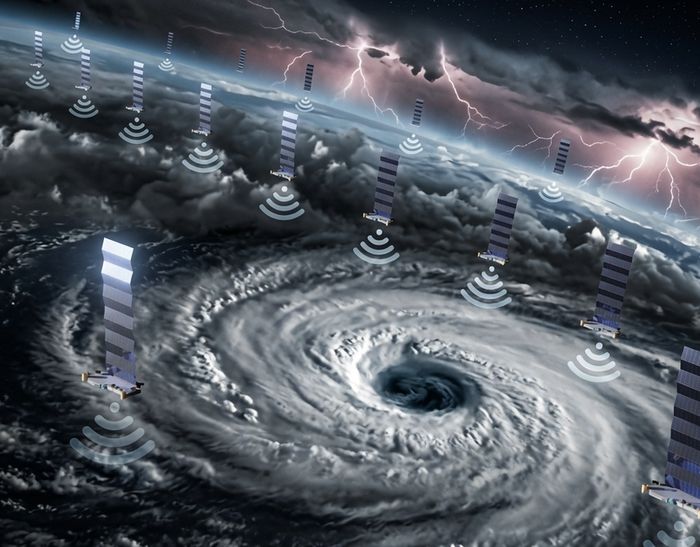
Why Starlink is different: Starlink has no ground-based towers in your local area. The signal comes from satellites 342 miles above the Earth. Your dish talks directly to space. No local power grid. No local tower. No local fiber line. The only local infrastructure is the dish on your roof and the router in your home — and those can run on battery power.
If you had satellite internet before — HughesNet, Viasat, or DirecTV broadband — you may remember how bad it was. Slow. Laggy. Unusable for video calls. Expensive for limited data. Starlink is a completely different technology.
Old satellite internet
Traditional satellite internet uses a handful of large satellites in geostationary orbit, roughly 22,000 miles above the Earth. At that distance, the round-trip signal time (latency) is 600 milliseconds or more — more than half a second for every packet of data to travel to space and back. That makes video calls choppy, gaming impossible, and web browsing frustratingly slow. Even a simple webpage loads slowly because dozens of round trips are required.
Starlink’s low Earth orbit approach
Starlink satellites orbit at just 342 miles altitude — roughly 64 times closer than geostationary satellites. The round-trip time drops to 20–40 milliseconds, comparable to wired cable internet. Instead of a handful of large satellites, Starlink operates a constellation of over 6,000 small satellites. At any given time, several are above your horizon and able to serve your dish. The result: real broadband speeds with real-world usability.
100+
Mbps typical download speed (Starlink Residential)
20–40
Milliseconds latency — comparable to cable internet
342
Miles altitude — 64x closer than old satellite internet
Honest about weather
Heavy rain and severe weather cause brief signal degradation — called rain fade. During a hurricane, expect the signal to weaken or drop briefly during the heaviest rain bands. It typically returns within seconds to a few minutes as conditions change. This is a real limitation, but it is not a dealbreaker. The signal is most reliable in the eye wall gaps and after the storm passes — exactly when you need to reach family and check on conditions.
Most Common Choice
Residential
$120 / month
Full unlimited service, no contracts. Best if you want to use Starlink as your primary home internet. Cancel anytime.
Best for Storm Prep
Standby Mode
$10 / month
Pause your service. Keep your account. Reactivate within hours when a storm threatens. Hardware stays registered and ready.
Roam
$150 / month
Use Starlink anywhere — home, RV, campsite. Slightly slower speeds. Good if you travel frequently or have an RV.
Priority (Business)
$250+ / month
Guaranteed speeds, prioritized during congestion. For home-based businesses where downtime costs money.
Standby Mode — The Strategy That Makes Starlink Affordable for Most Seniors
If you do not need full-time satellite internet — if you already have cable or fiber that works fine nine months of the year — Standby Mode is the answer.
Here is how the math works: You buy the Starlink hardware kit (one-time cost, roughly $349–$599 depending on hardware version). You activate service and set up the dish. You use it for a month or two to verify everything works. Then you switch to Standby Mode: $10 per month.
When a hurricane forms in the Gulf and your cable company’s infrastructure looks vulnerable, you log into your Starlink app or account and reactivate full service. Reactivation typically takes a few hours. You are back to full service before the storm arrives. When the storm passes and your cable is restored, you go back to Standby Mode.
Annual cost in Standby Mode: $120/year to keep Starlink ready. That is $10 per month. Less than one tank of gas. For that cost, you have emergency satellite internet available any time a storm threatens — on a few hours’ notice — for the life of the hardware.
The one thing to watch: Reactivation is not instant. During a major storm surge event with rapid track changes, you may have less warning than you think. The safest approach is to reactivate as soon as the storm enters the Gulf of Mexico — not when it is 48 hours from landfall. Reactivating five days early costs you about $20 extra. Worth it.

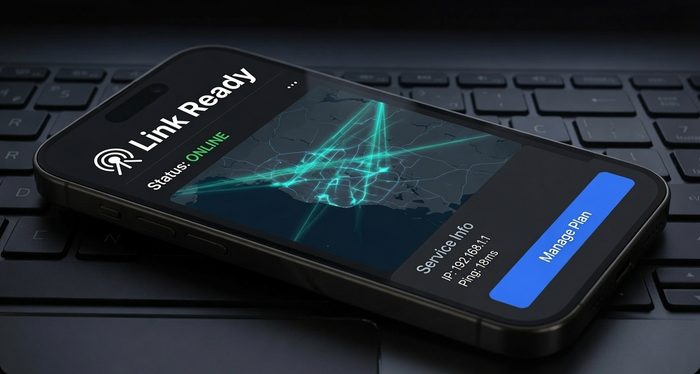
Here is the piece of information almost nobody talks about when they explain Starlink for emergencies. Once Starlink is running in your home, you do not need a special app, a separate phone number, or any new equipment to make and receive phone calls through it. You just turn on Wi-Fi Calling.
Wi-Fi Calling is already built into virtually every smartphone sold in the last eight years — iPhone, Android, Samsung, all of them. It is a single toggle buried in your phone’s settings. Once it is on, your phone automatically uses any available Wi-Fi connection — including your Starlink — to make and receive calls. Same phone number. Same contacts list. Rings exactly the same way. The person you are calling has absolutely no idea you are running through satellite internet.
✅ How to turn it on right now — before you need it:
iPhone: Settings → Phone → Wi-Fi Calling → toggle On. Done.
Android / Samsung: Settings → Connections → Mobile Networks → Wi-Fi Calling → toggle On. (Menu names vary slightly by carrier and phone model.)
Turn this on today, while everything is working normally. Test it by making a call while on Wi-Fi. You will not notice any difference — which is exactly the point.
When cell towers fail during a hurricane and your Starlink is running, your phone connects to Starlink’s Wi-Fi and Wi-Fi Calling takes over automatically. You can call 911. You can call your children. You can call your doctor. Your phone behaves exactly as it always did. No towers required.
And here is the other half of it: the moment cell towers come back online, your phone switches back to the cellular network automatically. In most cases you will never even notice the transition. It just works — in both directions — without you doing anything.
1
Setting to change on your phone. That’s it. Wi-Fi Calling is already built in.
911
Works over Wi-Fi Calling. Your location is registered to your home address with your carrier.
0
Extra cost. Wi-Fi Calling uses your existing plan minutes. No new subscription needed.
⚠️ One thing to know about 911 and Wi-Fi Calling: When you call 911 over Wi-Fi Calling, your carrier sends your registered home address to the dispatcher — not your GPS location. If you are calling from somewhere other than your registered address, tell the dispatcher your actual location immediately. This is standard behavior for all Wi-Fi Calling, not specific to Starlink.
Bottom line: Starlink + Wi-Fi Calling = a phone that works exactly like normal during a disaster, as long as your Starlink dish has power and a clear sky. This combination — a 00 dish, a battery station, and one phone setting — is more reliable communications infrastructure than most neighborhoods have after a major hurricane.

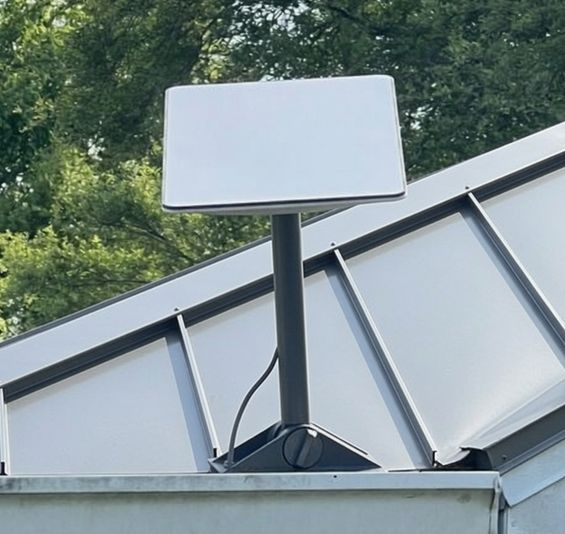
Starlink is designed for self-installation. You do not need an electrician. You do not need a cable company technician. You need a clear view of the sky, two hours, and the ability to run one cable from the roof or yard to your router inside.
The woman in this photo installed her dish in about 45 minutes on a Saturday morning. Her kids watched from the lawn. By lunch, the family had satellite internet that would keep them connected through any storm that knocked out the neighborhood’s cell towers and cable.
That is the whole job. One dish. One cable. One app on your phone. Everything else is automatic.
What comes in the box
The one requirement that matters: clear sky
Starlink satellites pass over from the general direction of the horizon and sweep overhead. Your dish needs an unobstructed view of a large portion of the sky — especially to the north in the continental U.S. (Starlink’s orbit paths mean you are looking north, not south like old satellite dishes.)
Trees, roof overhangs, chimneys, and neighboring buildings all block signal. Before you order hardware, use the Starlink app’s obstruction checker: point your phone at the sky from different spots in your yard and it will show you exactly what percentage of the sky is blocked and whether the location will work. This is the most important step in the whole process.
✅ What does NOT work with Starlink: Coaxial cable (the round black cable your cable TV uses). Old satellite dish locations (usually aimed south — wrong direction). Existing cable modem or router setups (Starlink has its own router). Apartment balconies often have too many obstructions. Check the app first.
Setup steps
1
Use the app obstruction checker to find the right location
Do this before you order. Open the Starlink app, tap the obstruction tool, and walk your property. Find the spot with the clearest sky. Ground-level works fine if you have a clear yard.
2
Order the hardware and wait for delivery
Order at starlink.com. Delivery is typically one to two weeks. In high-demand areas, there can be waitlists — another reason to order before storm season.
3
Mount the dish at your chosen location
The kit includes a basic ground stake for yard mounting. For roof or pole mounting, purchase a compatible mount separately (covered in the Products section). Point the dish toward open sky — it does the rest automatically.
4
Run the cable from the dish to the router location
One cable carries both power and data. Route it through a window, under a door, or drill a small hole through an exterior wall with a rubber grommet. Keep it away from sharp edges that could damage the cable.
5
Plug in the router and follow the app setup
The app guides you through network naming, password setup, and the first satellite acquisition. Most systems get their first signal within 10 minutes of being powered on.
6
Run a speed test and verify signal quality
The app shows real-time signal quality and any obstructions causing issues. If speeds are low, try adjusting the dish position slightly. You are looking for 50 Mbps or better for solid performance.
Having Starlink during a disaster only matters if you can power it when the grid is down. The good news: Starlink is one of the most power-efficient ways to get internet. The bad news: it still needs power, and “I’ll figure it out during the storm” is not a plan.
| Scenario | Starlink Power Draw | What Powers It |
|---|
| Normal operation | 50–75 watts | Wall outlet, generator, battery station |
| Startup / boot | Up to 100 watts (brief) | Any of the above — only lasts 1–2 minutes |
| Dish heating (cold weather) | Up to 100 watts | Not relevant for Florida; matters in northern states |
| Standby / idle | 20–30 watts | Very small battery or solar can maintain this |
Option 1: Your generator (easiest if you already have one)
Any generator over 1,000 watts can easily power Starlink. A 2,000-watt inverter generator — the quiet, fuel-efficient type — can run Starlink plus a refrigerator plus lights simultaneously and still have capacity to spare. If you are sizing a generator for your home, Starlink adds less than a small light bulb to your power budget. See our generator size calculator for help sizing a full-home backup system.
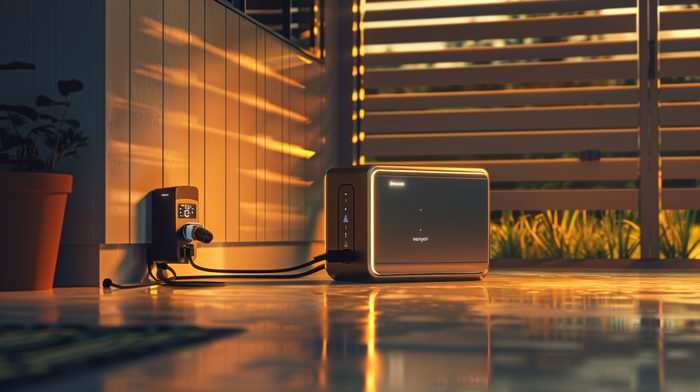
Option 2: Portable battery station (most flexible)
A 1,000–2,000 Wh portable battery station (EcoFlow, Jackery, Goal Zero) can run Starlink for 12–30 hours on a single charge, depending on capacity. These units recharge from solar panels, from your car, or from the wall when grid power returns. For a multi-day outage, pair a 1,500 Wh station with a 200-watt solar panel. On a sunny day in Florida, that combination can run Starlink indefinitely.
Option 3: Whole-home standby generator (best long-term)
A propane or natural gas standby generator kicks on automatically within seconds of a power failure and runs everything in your home including Starlink. This is the gold standard for seniors who want complete independence from grid power. If you have a whole-home generator, your Starlink needs no separate power planning — it just works. See our power generators guide for full details.
⚡ The math for a 1,500 Wh battery station: Starlink draws 65 watts average. 1,500 Wh ɇ 65W = approximately 23 hours of runtime. Add a 200W solar panel in Florida sun and you are generating 800–1,200 Wh per day — more than enough to run Starlink continuously while also charging phones and running small fans.
🚨 Important: Starlink uses a standard 120V plug. It works with any UPS (uninterruptible power supply), any inverter generator with a clean sine wave output, and any battery station with AC output. Make sure your battery station output is rated for 120V AC with pure sine wave — most quality units are.
The included kit comes with a basic ground stake for temporary or testing use. For permanent installation, you will want a proper mount. Here are your options:
Hurricane preparation tip: Consider what happens to a roof-mounted dish during a direct hurricane hit. The dish is rated for winds up to 100+ mph, but it is a surface area that catches wind. Some homeowners in the direct path of a major storm choose to temporarily dismount the dish and bring it inside, then remount after the storm. For Category 3 and below, most dishes survive on the roof without issue.
🔭 What’s Coming Soon
Direct to Cell — No Dish Required
Starlink has been hinting at, testing, and beginning to roll out a service called Direct to Cell. The concept is straightforward and significant: your existing cell phone connects directly to Starlink satellites without any special equipment, no dish, no router, no hardware purchase.
As of 2026, Direct to Cell has launched text messaging capability in partnership with T-Mobile in the United States. The service uses standard LTE protocols that existing smartphones already support. When your phone has no terrestrial cell signal, it can connect to a Starlink satellite overhead and send and receive text messages.
What is already working: Text messaging (SMS) to and from any number during satellite coverage windows. Emergency alerts. Basic connectivity checks.
What is coming in later phases: Voice calls. Data connectivity for basic internet use. Broader carrier partnerships beyond T-Mobile.
What this means for seniors in disaster zones: In a future hurricane scenario, even if every cell tower within 50 miles is destroyed, a phone with Direct to Cell service could still send a text to family, receive an emergency alert, or make a call — as long as a Starlink satellite is overhead (which, with 6,000+ satellites, is nearly always the case).
You do not need to do anything today to prepare for this — your existing smartphone will be compatible when the service expands. But it is worth watching, because it represents a fundamental change in what happens to communications in a disaster. The day may be coming when no cell tower failure can silence a phone with a clear view of the sky.
✅ Recommended action today: If you are on T-Mobile, verify your account is enrolled in the T-Mobile – Starlink Direct to Cell partnership. Check T-Mobile’s website for current availability and enrollment steps. The service was in beta rollout as of 2026 with broader availability expected. Other carriers may announce partnerships as the service matures.
Not everyone needs Starlink. Work through this checklist before you order:
Do you live in a hurricane, wildfire, ice storm, or tornado zone? If your area has had a major grid outage in the last ten years, the answer is yes. Florida, the Gulf Coast, the Carolinas, and Tornado Alley are obvious examples. If yes: Starlink is worth serious consideration.
Do you have a clear view of the sky from your property? Use the Starlink app obstruction checker at your location before ordering. If your yard is completely canopied by large trees on all sides, Starlink may not work well. Most suburban and rural homes have at least one viable location.
Do you have — or are you willing to get — a backup power source? Starlink without backup power is only useful until the grid goes down. If you have a generator, a battery station, or are willing to get one, this is not a barrier.
Can you get someone to help with installation if needed? The setup is easy for most people. Roof mounting may require a ladder and someone to hold it. If you have limitations that make this difficult, a handyman or family member can complete the install in a few hours.
Are you on a fixed income or tight budget? The hardware is a one-time cost ($350–$600). Standby Mode is $10/month. If $600 plus $10/month is workable, Starlink is accessible. If budget is very tight, prioritize this over other prep items — the communications value in a disaster is difficult to overstate.
Do you have a family member who depends on reaching you during a disaster? Adult children, a spouse in a care facility, elderly parents who depend on you — if someone needs to be able to reach you when cell towers fail, this is not optional. It is family infrastructure.
Do you or someone in your household depend on internet-connected medical equipment or telehealth? CPAP pressure management apps, insulin pump monitoring, remote patient monitoring, telehealth appointments — all require internet. In a multi-day outage, satellite internet could be medically significant.
If you checked three or more of those: Order Starlink this week. Use Standby Mode after the first month if you do not need it full time. The $10/month cost to keep it ready is one of the best emergency prep values available.
If you checked fewer than three: You are probably fine with a good communication plan (out-of-area contact, battery-powered radio, NOAA weather alert receiver) and may not need satellite internet specifically.
Does Starlink actually work during a hurricane?
Yes, with caveats. Starlink operates independently of ground-based towers. During Hurricane Ian in 2022, Starlink terminals in Southwest Florida were functioning when all cell service was down. The signal degrades briefly during the heaviest rain bands — a phenomenon called rain fade — but typically returns within seconds to a few minutes. After the storm passes, Starlink is usually the first communication method back online.
What is Standby Mode and how do I use it?
Standby Mode pauses your service for $10/month instead of the standard $120/month. Your hardware stays registered, your account stays active, and you can reactivate full service within a few hours through the app or website. Log into your Starlink account, go to Service Plans, and select Standby. Reactivate before a storm threatens — at least 24–48 hours before landfall.
How much power does Starlink use?
The Standard dish and router together draw 50–75 watts during normal operation, with brief peaks up to 100 watts at startup. This is equivalent to one incandescent light bulb. Any generator over 1,000 watts can power it. A 1,000 Wh battery station will run it for approximately 14 hours without recharging.
Is Starlink hard to set up if I am not tech-savvy?
It is designed for self-installation and most users have a working connection within 30 minutes. The dish finds satellites automatically — no manual aiming. The app walks through every step. The hardest part is choosing a location with a clear view of the sky, which the app’s obstruction checker helps you do before you even order the hardware. If you can follow a step-by-step app guide on a smartphone, you can set this up.
Can I use my existing router with Starlink?
Starlink includes its own Wi-Fi 6 router, which works well for most homes. If you want to use your own router, purchase the Starlink Ethernet Adapter ($25) from Starlink’s accessories page. Starlink does not use coaxial cable and cannot connect to a standard cable modem setup.
Will rain or clouds block the signal?
Light to moderate rain has minimal impact. Heavy thunderstorms cause brief signal degradation lasting seconds to a few minutes — called rain fade. During a hurricane’s worst rain bands, expect intermittent drops. The connection returns between bands and is typically fully reliable once the worst precipitation has passed. Snow accumulation on the dish can block signal — the dish has a built-in heater to melt snow, though this is not a concern in Florida.
What is Starlink Direct to Cell, and do I need to buy anything for it?
Direct to Cell is a Starlink service — currently in early rollout with T-Mobile — that allows your existing cell phone to connect directly to Starlink satellites without any special equipment. Text messaging is already available in some markets. Voice and data are coming in later phases. You do not need to buy anything. Your existing LTE smartphone is compatible. Check with your carrier for enrollment details.
Does Medicare cover Starlink or satellite internet?
Medicare does not cover internet service. Some states have Low Income Home Energy Assistance Program (LIHEAP) expansions or broadband assistance programs. The federal Affordable Connectivity Program provided discounts for qualifying households — check with your internet service provider or your state’s public utilities commission about currently available assistance. At $10/month in Standby Mode, Starlink is within reach for most fixed-income households.
What happens if I forget to reactivate Standby Mode before a storm?
Reactivation takes a few hours — typically two to four. If a storm arrives faster than expected and your cable service goes down before you reactivate, you will have no service until reactivation completes. This is why the safest approach is to reactivate as soon as the storm enters your region — five days out rather than 24 hours. The extra cost is approximately $20. Worth it for the peace of mind.
Can I take my Starlink dish to an evacuation destination?
Yes, if you have a Roam plan. Residential plan subscribers are assigned to a service address — the dish works best there and may have degraded performance or be blocked in distant locations. If you frequently evacuate long distances, the Roam plan ($150/month) is designed for exactly this use case and works across the continental U.S. You can temporarily upgrade to Roam for a month during storm season and return to Residential or Standby afterward.
How long does Starlink hardware last?
Starlink rates the Standard dish for outdoor use in conditions ranging from −22°F to 122°F and wind speeds up to 100+ mph. Real-world reports from early adopters show dishes still functioning after five-plus years of continuous outdoor exposure. There are no moving parts in the dish — the self-leveling mechanism uses motors that occasionally need replacing in older units. Starlink offers warranty replacement and will ship replacement hardware for hardware failures.
Most seniors do not buy Starlink for themselves. Their adult children push them to do it — usually after a hurricane scare, usually after spending three days unable to reach their parents by phone. If that is you, here is what you need to know.
The install is genuinely easy. If your parents can plug in a lamp and use a smartphone, they can set up Starlink. The harder part is convincing them to spend $500 on something that seems unnecessary when the weather is fine. That is the conversation to have in February, not in August when a storm is forming in the Gulf.
What to say to your parent who thinks they do not need it:
“Mom, after Hurricane Ian, there were seniors in Cape Coral who could not call 911 for twelve days because every cell tower was down. One couple who had Starlink spent those twelve days helping their neighbors make welfare calls and track medication deliveries. The dish cost $500. Standby Mode is $10 a month. I will help you set it up.”
That is the whole conversation. The $10/month Standby Mode removes the “why am I paying for something I never use” objection. Offer to set it up on a visit. Offer to pay for the first year of Standby Mode yourself — it is $120.
Once it is installed, make sure Wi-Fi Calling is turned on their phone before you leave. Walk them through calling you on it once while connected to Starlink Wi-Fi so they know it works. Check the battery station charge level. Write the Starlink account login on a card and put it somewhere they will find it. You are building a system that works without you being there.
And then call them when the next storm threatens. Remind them to reactivate Standby Mode. That five-minute call may be the most important preparedness action your family takes.
Starlink is running. Your phone is on Wi-Fi Calling. The cell towers are down. Here is what you can actually do that you could not do without it — written out so you have a plan before you need one.
✅ Make a printed card before storm season: Write down the websites and login credentials for your pharmacy portal, MyChart or medical provider, insurance company app, FEMA assistance site, and your local county emergency management page. Keep it with your important documents. When the storm hits, you will not be trying to remember passwords.
Starlink is not a set-and-forget system. Like a smoke detector or a car battery, it needs a quick annual check to make sure it will work when you need it. Set a calendar reminder for February 1st every year. The whole process takes about 20 minutes.
Reactivate Standby Mode to full service for one month. Log into your Starlink account and switch from Standby to active Residential service. Run a speed test. Make a Wi-Fi call. Confirm everything is working. Then switch back to Standby. Cost: one extra month at $120. Worth it to confirm your emergency system actually works.
Inspect the dish and cable connections. Walk outside and look at the dish. Any physical damage? Any debris on the surface? Check the cable where it exits the dish and where it enters your home. The push-lock connectors can loosen over a year of thermal cycling. Reseat them firmly.
Check your battery station holds a charge. Plug in your EcoFlow, Jackery, or Goal Zero. Charge it to 100%. Unplug it and run Starlink from it for two hours. Check the remaining percentage. If it has dropped significantly more than expected, the battery may be degrading and need replacement.
Confirm Wi-Fi Calling is still enabled on all phones in the household. Phone updates occasionally reset this setting. Go to Settings → Phone → Wi-Fi Calling on every phone in the house and confirm it is on. Make a test call over Wi-Fi to confirm.
Verify your Starlink account login. Log into your account at starlink.com. Confirm you can reach the Service Plans page where you would reactivate service. If you have forgotten the password, reset it now — not during a storm warning.
Check the Starlink app for firmware updates. Open the Starlink app and let it connect to your dish. The app will indicate if a firmware update is available. Updates install automatically, but confirming the app is working confirms the dish and router are communicating properly.
Check your solar panel connections if you have one. Clean the panel surface with a damp cloth. Check the cable connections to your battery station. A dirty panel in Florida sun loses 10–15% efficiency. A loose connection loses more.
Write your reactivation reminder on a physical card. “When a storm enters the Gulf: log into starlink.com, go to Service Plans, reactivate Residential service.” Tape it inside a kitchen cabinet. During a storm warning, you will be stressed. The card removes one thing to remember.
A Category 3 or lower storm usually leaves rooftop Starlink dishes intact — they are rated for 100+ mph winds. But a direct hit, falling debris, or a major storm can damage or destroy the dish, the cable, or the mount. Here is what to do if that happens.
✅ The temporary ground solution: If your roof mount is damaged but your dish and cable are intact, set the dish on the ground in a clear area of your yard using the basic stake that came in the original kit. It will work from ground level in most yards. You can be back online the same day the storm passes while you arrange a permanent mount repair.
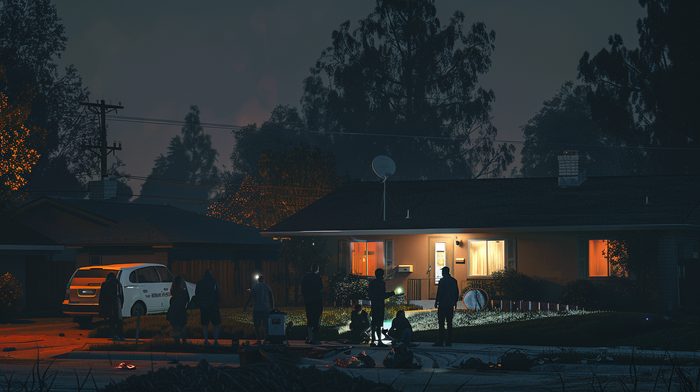
Starlink’s Wi-Fi router broadcasts a signal that reaches 150–200 feet in open air. In a typical suburban neighborhood, that covers two or three houses on either side of yours. During a disaster when every cell tower is down, that Wi-Fi signal — and the satellite connection behind it — makes your home the most valuable communication resource on the block.
The couple in Cape Coral after Hurricane Ian did not plan to be a neighborhood communication center. They just had Starlink. Neighbors found out and started showing up to use the Wi-Fi to call their families. Word spread. Within 24 hours, people were coming from three blocks away. One $500 dish kept an entire neighborhood connected for twelve days.
How to set this up before a storm hits
The math on neighborhood coordination: If one Starlink dish costs $500 and serves 20 households during a disaster, the per-household cost is $25. If six households on your block each contributed $25 toward one Starlink setup, everyone would have emergency communications for the cost of a dinner out. This is worth discussing with your immediate neighbors before storm season — not as a formal agreement, but as a conversation about preparedness.
📋
Free Printable Checklist — Starlink Emergency Readiness
All 8 sections on one page: hardware setup, Wi-Fi Calling, Standby Mode, power backup, neighbor coordination, annual check, when a storm threatens, and after the storm. Print it. Keep it with your important documents.
⬇️ Download PDF Checklist
📖 Complete Your Blackout Plan on SeniorBlackoutGuide.com
⚡ Generator Size Calculator — How big a generator do you need? Enter your home and medical equipment loads and get a specific recommendation.
🔋 Power Generators Guide — Portable, inverter, standby — which type is right for your situation and budget.
🔨 The Grandfather Toolkit — Every tool you need to install your own Starlink mount, run cable through walls, and handle every home prep task at 50–70.
📖 Barbara’s Story — Nine days without power after a hurricane. What she needed and what she did not have.
🧳 CPAP Battery Calculator — Size your battery backup for overnight CPAP use combined with Starlink and other loads.
$10 a Month to Stay Connected in Any Disaster.
Buy the hardware once. Switch to Standby Mode. Pay $120 a year to keep satellite internet on standby. Reactivate in hours when a storm threatens. That is the whole plan.
The twelve-day communication blackout after Hurricane Ian cost people far more than $600 in stress, danger, and lost options. The couple in Cape Coral who had Starlink spent that twelve days helping neighbors. Everyone else waited for cell service to come back.